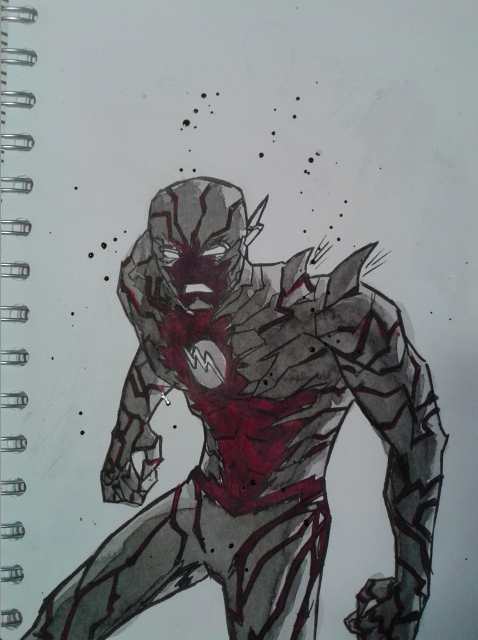
New 52 Reverse Flash ink washed

Avatar image for skinja
Skinja

130

Forum Posts

0

Wiki Points

0

Followers

Reviews: 0

User Lists: 0

#1  Edited By Skinja
So after inking it with a pen I set up my inks. I had a couple of brushes so I was ready to go.
I determined where the light source was and began layering the ink to get some shadows.
I used a C-7 Grey Copic marker in combination with a R29 red Copic marker to get the colour of his chest/face I also used them for the veins that run across his body. I put paper over his face and chest when I started to flick ink on to the drawing to make sure they aren't affected.
Added the yellow for his emblem, eyes, mouth and earpiece.
Lastly I added some grey to the background, flicked more ink onto the picture and added red energy lines. Honestly I think I went overboard with the amount of elements by the end of the picture and it makes it look cluttered. But I had fun so oh well.

And that was my first time ink washing something. Is there anything you guys think I can improve on?

Avatar image for iceprince_x
IcePrince_X

5211

Forum Posts

628

Wiki Points

0

Followers

Reviews: 0

User Lists: 0

I agree with your last pic observation. But that is how the process of learning and getting acquainted with the medium and your aesthetics before mastering and refining it to your own style.

Nevertheless, this is a pretty hot work.

Avatar image for cutter
Cutter

1026

Forum Posts

550

Wiki Points

0

Followers

Reviews: 0

User Lists: 1

Cool...I think you did well with your brush and ink. I done brush and ink before and is not easy. Maybe later on I will post a 18x24 brush and ink of Storm that I did for practice. Plus other I did while in college.

Avatar image for toastergeist
Toastergeist

238

Forum Posts

0

Wiki Points

0

Followers

Reviews: 0

User Lists: 0

Cool.

Avatar image for kidchipotle
kidchipotle

15770

Forum Posts

229

Wiki Points

0

Followers

Reviews: 0

User Lists: 1

No Caption Provided

Avatar image for skinja
Skinja

130

Forum Posts

0

Wiki Points

0

Followers

Reviews: 0

User Lists: 0

#6  Edited By Skinja
Avatar image for doom_doom_doom
DoomDoomDoom

4405

Forum Posts

33212

Wiki Points

0

Followers

Reviews: 9

User Lists: 10

#7  Edited By DoomDoomDoom

I really like how you show you progress to the finished piece. I agree maybe a little cluttered but pretty cool regardless.

Avatar image for bumpyboo
BumpyBoo

14986

Forum Posts

270338

Wiki Points

0

Followers

Reviews: 10

User Lists: 20

#8 BumpyBoo  Moderator

Is always such a treat to see a piece come together in stages like this, liking the picture but also, thanks for sharing the process :)

Avatar image for sighburr_punk
Sighburr_Punk

227

Forum Posts

0

Wiki Points

0

Followers

Reviews: 0

User Lists: 0

#9  Edited By Sighburr_Punk
Avatar image for skinja
Skinja

130

Forum Posts

0

Wiki Points

0

Followers

Reviews: 0

User Lists: 0

#10  Edited By Skinja